Step-by-Step Guide: Uploading a WordPress Theme Zip, Installing a Themeforest Theme, and Importing Demo Content
In the ever-evolving realm of web design and development, WordPress emerges as a prominent and user-friendly platform, empowering millions of websites with its extensive theme and plugin repository. If you’ve recently acquired a theme from Themeforest and are eager to kickstart your website, you’ve landed in the perfect spot. In this comprehensive guide, we’ll walk you through the intricate process of uploading a WordPress theme zip file, installing your Themeforest theme, and seamlessly importing demo content. Let’s embark on this journey!
Introduction
Before we embark on this journey, let’s establish our goal. Themeforest stands as a renowned marketplace, offering an extensive array of WordPress themes catering to diverse purposes. Uploading and installing a Themeforest theme with demo content can save you significant time and effort when building your website from the ground up. Let’s dive right in!
Preparing for Installation
Before delving into the installation process, certain preparations are paramount:
- WordPress Installation: Ensure you have a functional WordPress instance running on your web server. If not, visit WordPress.org to download it and follow their installation instructions diligently.
- Theme Zip File: After procuring a theme from Themeforest, you’ll receive a downloadable zip file. Safeguard it on your computer for the upcoming steps.
Uploading the Theme Zip File
Now that your theme zip file is at your disposal, let’s proceed with these steps:
- Log in to your WordPress dashboard.
- Navigate to “Appearance,” then “Themes.”
- Click the “Add New” button.
- Opt for the “Upload Theme” option.
- Select the theme zip file you retrieved from Themeforest.
- Click “Install Now” and patiently await WordPress to upload and unpack the theme.
Installing the Themeforest Theme
Once the theme is successfully uploaded, let’s take the next step:
- After the installation concludes, click the “Activate” button to set the theme in motion on your website.
Activating Your Theme
Now that your theme is in place, it’s time to breathe life into it:
- Go to “Appearance,” then “Themes.”
- Locate the Themeforest theme you just installed and click the “Activate” button.
Importing Demo Content
With your theme activated, you’re now ready to infuse your website with dynamic demo content:
- Hunt for theme-specific plugins or settings that facilitate the importation of demo content; many Themeforest themes feature this functionality.
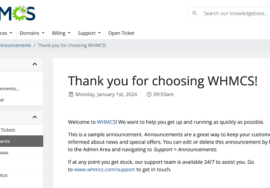
- Adhere to the prompts and guidance furnished by the theme to import the demo content. This operation will populate your website with sample data and layouts, giving it an appealing structure.
Customizing Your Website
Following the assimilation of demo content, commence the journey of personalization:
- Replace the demo content with your unique text, images, and multimedia elements.
- Fine-tune the theme settings to align with your branding and preferences.
- Explore supplementary customization options extended by the theme or available WordPress plugins.
Congratulations! You’ve flawlessly executed the processes of uploading, installing, and tailoring a Themeforest theme enriched with demo content on your WordPress website.
Conclusion
In this meticulous, step-by-step guide, we’ve comprehensively covered the intricate maneuvers of uploading a WordPress theme zip file, installing a Themeforest theme, and seamlessly integrating demo content. By meticulously following these steps, you can swiftly erect a professional-looking website, all without the necessity for an extensive coding skill set. Relish the process of constructing your online presence!